

Trying out (stealing) the style of Simons Cat for the RiKARD idea… might work… no sound for this test.
Monthly Archives: January 2014

Making the VashiMorph resolution-independent
 |
I’ve been playing away in my spare time with both a semi-secret home-“improvement”-project (hint: it involves big images and little to no feng shui) and also been thinking about the VashiMorphic40 preset that was released by VashiProductions and I talked about in the last post.
I mentioned there that there was one thing that I didn’t really go for, and that was the packaging. Well, that’s not entirely true, because I also quickly surmised that it’s a bit resolution-dependent. Apply it to something that isn’t standard 1920×1080 square pixel and it breaks quickly.
 |
| 720p Gopro footage in 1080p comp |
 |
|
|
 |
| Adding it to a 1080p adjustment layer on top of it makes it a bit better. But not quite what I want |
 |
| This is what my modification gives when applied on the 720p-layer |
So I found myself with some more spare time. And I decided to try and fix that part. This means going through each and every parameter in the BezierWarp-preset that is VashiMorphic40 and making them rely not on one specific set of coordinates but instead on percentages of the layer-size.
First I went ahead and made sure that the top left corner controlled what the other corners were doing. This was fairly simple. Just taking the width and height -expressions and subtracting with whatever it’s mirroring parents properties are set to.
Then came the tricky part. Going through the parameters for the top left corner and making them dependent on percentages instead of absolute pixel-values… while still making sure that when the preset is done, it’s supposed to default to the VashiMorphic40 look.

Well, it took me half the night (my expression-coding is a bit rusty). But now I have made a preset that actually seems to work pretty decently in any resolution. Producing the same curvature… assuming of course that the layer itself is in a 1.78:1 aspect ratio. To get things to work fairly well, I had to add a few sliders that control the percentage of the curvature and how the curvature is done.
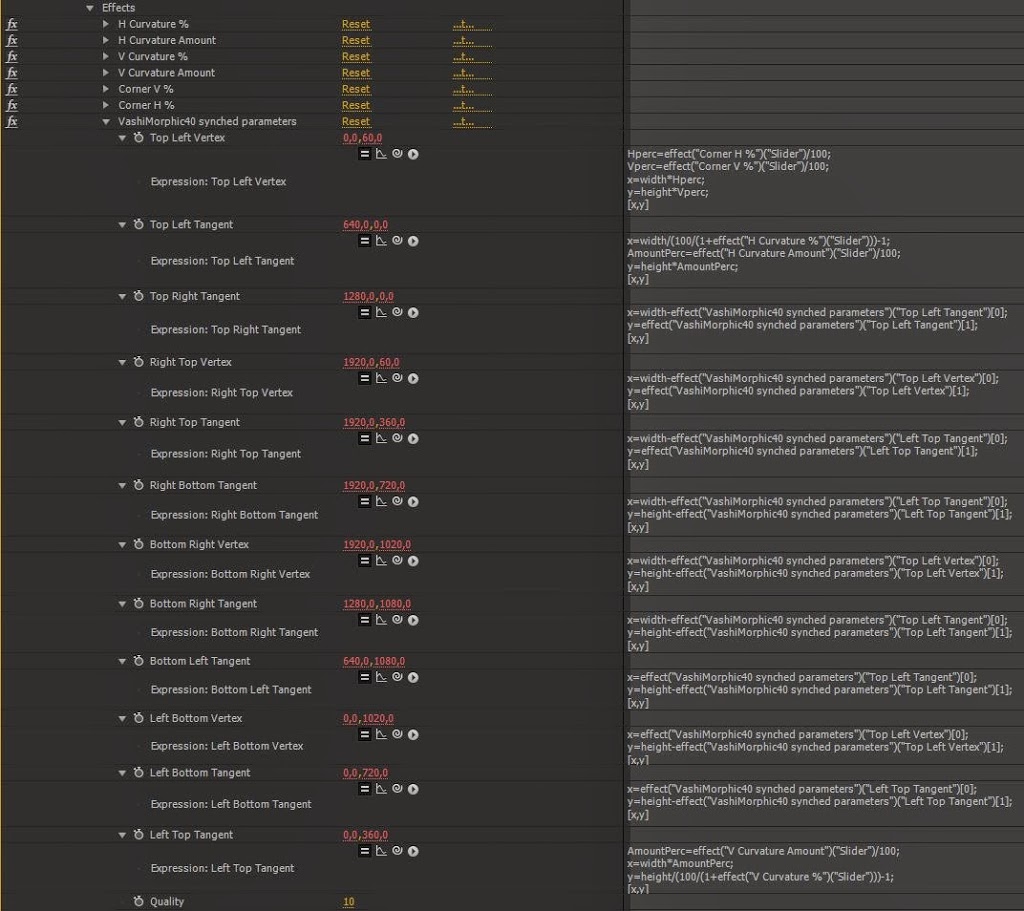
Of course, I could have just made it recreate the standard VashiMorphic40, but I wanted to be able to simply do my own versions of curvature based on my own lenses. I’m not all that impressed with my naming-scheme for the sliders, but they will let me do more or less curvature like in the anamorphic lenses that this whole thing started with. And I can also do smile-boxing as in the video-releases of those CineRama-productions of yore.
If anyone wants to try it out it’s in a link below here:
>>> VashiMorph40Synched <<<
Just add it to your user presets folder.
But one thing to note. The percentage-sliders are based on the full width and height of the layers. This means that 50% is halfway through the picture. and 100% is all the way to the other side. So, for normal subtle work I wouldn’t reccomend pulling the curvature-sliders much farther than 30%.
– Oh, and yeah… that potterthon thing… I will finish it. I swear I will!